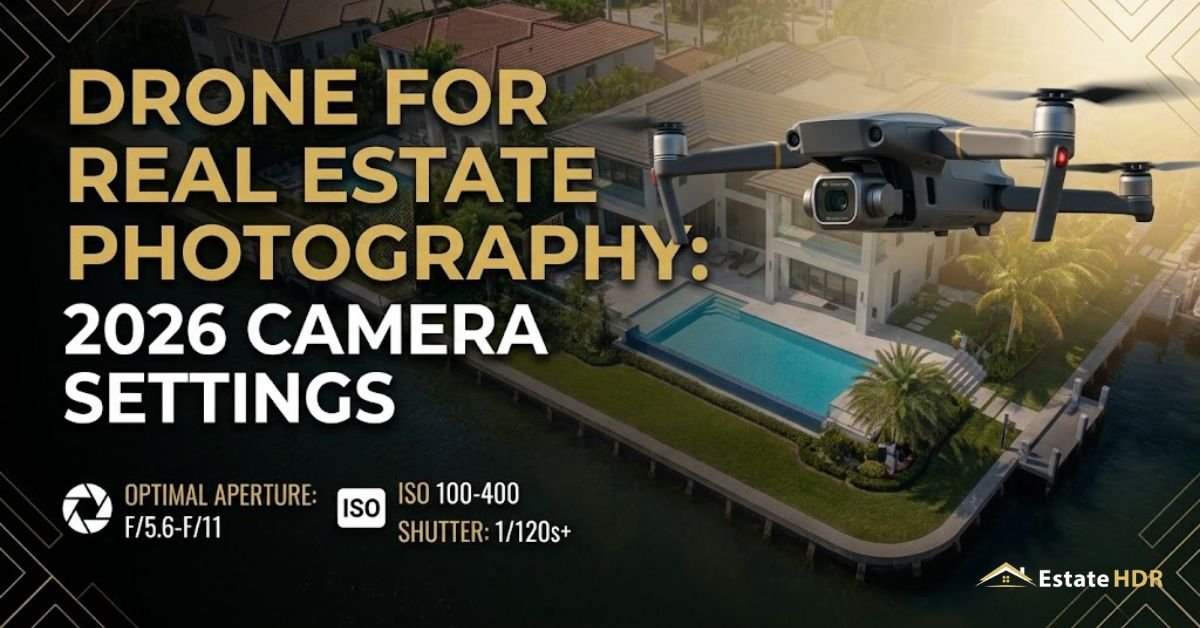
By Estate HDR Team | Published: September 2026
Most weak aerial listing photos are not a flying problem. They're a settings problem. The aircraft held position fine. The roof still came back mushy, the sky blew out and the video judders every time the camera pans left. Set up a drone for real estate photography the way you'd set up a camera on a tripod and you hand your editor files that bend. Leave it on auto and you hand over twenty frames that fight back. This post covers exposure, shutter, aperture, ISO, bracketing, filters, white balance and gimbal motion.
Quick Answer at a Glance
Shoot stills in RAW at ISO 100 with the aperture near f/4 on a small sensor and the shutter at 1/500 or faster. Shoot video at 24 or 30 fps with the shutter locked to double the frame rate, which needs an ND filter outdoors. Set white balance by hand. Bracket three frames when contrast is high.
| Setting | Aerial stills | Aerial video |
|---|---|---|
| File format | RAW, or RAW plus JPG | Highest bitrate the card supports |
| ISO | 100 normally, 400 hard ceiling | 100 to 200, never above 400 |
| Aperture | f/4 to f/5.6 on a 1 inch sensor | Same, or fixed on smaller drones |
| Shutter | 1/500 calm, 1/1000 windy | Double the frame rate. 1/48 at 24 fps, 1/60 at 30 fps |
| White balance | Locked Kelvin number, not auto | Locked Kelvin number, not auto |
| Filters | Rarely needed | ND8 to ND64 depending on the sun |
One note before the dials. Nothing below covers FAA Part 107 rules or airspace approval, which get their own post.
Drone for Real Estate Photography: Four Terms Worth Getting Right
180 degree rule: a video habit where shutter speed is set to double the frame rate. At 30 fps that means 1/60 of a second. Movement then carries the slight blur our eyes expect.
ND filter: dark glass that screws onto the lens. It cuts light without changing color, which is the only way to hold a slow shutter in bright sun.
AEB: auto exposure bracketing. The camera fires a burst of one view at different brightness levels. An editor blends them into a frame holding both sky and eaves.
Kelvin lock: choosing color temperature as a number instead of letting the camera guess. It stops color drifting between frame one and frame forty.
Stills: Aperture ISO and a Shutter Fast Enough for a Moving Aircraft
A drone is never truly still. It holds a spot by making tiny corrections several times a second. That is why aerial stills need a faster shutter than tripod work. 1/500 is a sensible floor on a calm day. Push to 1/1000 when wind picks up.
Aperture is where borrowed advice goes wrong. Ground photography says f/8 to f/11 for corner to corner sharpness. Small drone lenses don't behave that way. Most peak near f/4 and soften from f/5.6 upward, because the opening is already tiny. On a one inch sensor, f/4 to f/5.6 is the window. On folding aircraft it is often fixed.
ISO is the simple one. Keep it at 100. 200 is fine and 400 is the ceiling for client work. Shingle texture is lost the moment ISO passes 400. Noise reduction never puts it back.
Exposure compensation is the dial nobody touches. Aim at a pale roof ringed by dark landscaping and the meter overexposes. Minus 0.3 or minus 0.7 EV protects the bright end. You have probably lost a white roof to clipping at least once and never worked out why.
Video: The 180 Degree Rule and the Filter That Makes It Work
Video has one rule that outranks the rest. Shutter speed doubles the frame rate. 24 fps means 1/48. 30 fps means 1/60. Break it and motion looks wrong in a way viewers feel instantly. Too fast and a pan stutters. Too slow and the frame smears.
Here is the catch. 1/60 at midday is far more light than any sensor wants. Even at ISO 100 the frame blows out. That is the whole job of an ND filter. Starting points: ND8 for heavy overcast, ND16 for hazy sun and ND32 or ND64 for a clear July noon.
Frame rate is a delivery decision. 24 fps reads as film. 30 fps is safer for social platforms that resample video. Shoot 60 fps only for shots you plan to slow down.
Gimbal settings do the rest. Drop pitch speed to the slowest setting the controller allows. Around 10 to 15 degrees per second suits a reveal. Faster and a tilt feels like a head turn. Turn smoothness or EXP down so stick inputs ramp rather than snap.
Flat color profiles are the last choice. D-Log holds more of the bright and dark ends for grading. Straight off the card it looks washed out. Shoot flat only when somebody is definitely grading.
Drone and Video Editing Service Snapshot
| Field | Detail |
|---|---|
| Service | Aerial video editing and drone cinematic packages, plus HDR blending for aerial stills |
| Accepted inputs | Drone video clips and aerial RAW or JPG stills. Bracketed sets welcome |
| Delivered formats | Edited MP4 for listing pages and social, plus full resolution and MLS sized JPG for stills |
| Turnaround | No separate video turnaround is published. The site wide claim is 24 hour turnaround |
| Starting price | Social reel $15, full 4K walkthrough $30, drone cinematic package $45 per video |
| Client rating | No rating published for video work. Photo editing sits at 4.99/5 from 340+ reviews |
Video and drone editing has no standalone service page yet. The current rates sit in the homepage pricing block. Aerial stills are priced with the rest of the photo work.
Bracketing From the Air Versus One RAW Frame
Aerial exteriors carry a brightness spread ground shots rarely match. Bright sky on top, a bright roof in the middle and shadowed landscaping below. Bracketing keeps all three.
| Frames per angle | EV spread | Wind tolerance | What editing can recover |
|---|---|---|---|
| 1 RAW | n/a | Any conditions | About 2 stops of shadow, roughly 1 stop of highlight |
| 3 frames | -2, 0, +2 | Calm to light breeze | Sky detail plus shadow detail in one blend |
| 5 frames | -2 to +2 in 1 EV steps | Calm only | Smoother transitions on glass and metal roofs |
| 7 frames | -3 to +3 | Near still air | Rarely needed outdoors. Slowest to shoot |
Three frames covers almost every listing. Five earns its place on a metal roof or a wall of west facing glass. Seven wastes flight time.
Two conditions make bracketing useless from a drone. Wind that shifts the aircraft between frames. Trees moving in that wind. Both leave ghosting no blend can repair. On a gusty day take one well exposed RAW.
Settings That Change With the Hour and the Season
Shoot the same house in June at 1 p.m. then again in December at 3 p.m. and the first set of settings will fail. Nobody writes this part down. The sun sits lower, shadows stretch and the roof stops being the brightest thing in frame.
| Conditions | ISO | Aperture | Stills shutter | Kelvin | Video ND | Watch for |
|---|---|---|---|---|---|---|
| Summer midday, clear | 100 | f/4.5 | 1/1000 | 5500K | ND32 to ND64 | Blown roof, black shadow under eaves |
| Summer golden hour | 100 | f/4 | 1/500 | 4000K | ND8 to ND16 | Long shadows crossing the lawn |
| Autumn overcast midday | 100 to 200 | f/4 | 1/400 | 6500K | ND8 | Flat gray sky, low contrast |
| Winter low sun midday | 100 | f/4.5 | 1/640 | 5200K | ND16 | Sun flare into the lens at low angles |
| Winter snow cover | 100 | f/5.6 | 1/1000 | 5500K | ND32 | Gray snow unless you add +0.7 EV |
| Spring dusk, blue hour | 200 to 400 | f/4 | 1/125 with care | 3800K | None | Motion blur, rising noise |
Two forces drive that table. Sun angle sets the contrast. Season sets how much of the bouncing light is green.
Bare winter trees throw far less light back at a wall than a summer canopy does. The shadow side goes darker in January than it ever does in July. That is an extra stop to protect, which is when a three frame bracket stops being optional. Snow flips it. A meter reading a white lawn pulls everything down until the snow turns gray. Plus 0.7 EV is the fix.
Golden hour is the one everybody chases. It punishes auto white balance hardest, because color temperature keeps dropping while you fly. Lock Kelvin at the start. Forty frames that match beat three that are perfect.
Five Settings to Lock Before Takeoff
- Set the file format to RAW plus JPG. The JPG is the agent preview. The RAW is what gets edited.
- Take ISO off auto and set 100 by hand. Auto ISO climbs to 800 on a shaded approach without telling you.
- Set white balance to a Kelvin number that matches the light: roughly 5500K in clear sun, 6500K under cloud and 3800K near sunset.
- For video, fit the ND filter that puts your shutter at double the frame rate. Confirm it while hovering at working height.
- Fire one test frame at your working angle and read the histogram. If the right edge stacks against the wall, pull exposure compensation down before shooting the set.
How Estate HDR Handles Aerial Files
- Submit: upload aerial RAW or JPG stills and drone clips through your account, with a note on property style and finish.
- Produce and QA: brackets are aligned and blended, wind ghosting is cleaned by hand, color is matched across aerial and ground sets, then a second editor checks the batch.
- Delivery: edited video comes back ready for listing pages and social. Aerial stills arrive as full resolution and MLS sized JPG.
Finished aerial and ground work sits in the portfolio with before and after sliders across 8 categories. A free first order starts at registration.
What an Editor Sees When Your Aerial Files Land
Editors can tell what your settings were before reading any metadata. Some files open up. Others arrive already finished, in the worst sense.
Clipping is the one nobody recovers from. A roof or sky pushed past pure white holds no information. Nothing to pull back, only white pixels to paint over. A blown sky quietly becomes a sky replacement job instead of a simple blend. Half a stop would have prevented it.
Auto white balance is the second file killer. Fly one orbit and the camera picks a different temperature on the sunny side than the shaded side. Now every frame needs its own correction. The gallery still reads as two houses. Locked Kelvin means one correction for the batch.
JPG only is workable but thin. An 8 bit file holds far fewer levels of tone than a RAW. Lift a gray sky and the gradient breaks into visible bands. Those bands show worst on a big monitor, which is where buyers browse.
Then there is what gets baked in on the aircraft. Heavy sharpening leaves a bright halo along every roof line and nothing removes it. Cranked saturation clips the lawn. Digital zoom invents pixels. Motion blur is permanent. Full stop.
Video sets fail differently. Mixed frame rates across one property make a clean cut impossible without conforming footage first. A clip shot at 1/2000 with no filter strobes beside a filtered one. One flight, one frame rate, one shutter rule.
What Aerial Editing Costs in 2026
Editing prices don't move with your settings. What moves is how many frames come back usable. Estate HDR prices aerial work the same way it prices ground work.
Aerial stills run through the same blending pipeline as ground exteriors, starting at $0.80 per photo on the HDR and flambient editing page, with 3 to 7 brackets at -2, 0 and +2 EV recommended plus a 12 to 24 hour turnaround. That service holds a 4.99 out of 5 rating from 340+ reviews.
"Video sits in the homepage pricing block: $15 for a vertical social reel, $30 for a full 4K walkthrough and $45 for the drone cinematic package. A free first order is the cheapest way to see how your own settings hold up under an edit."
A photographer shooting a two acre property in upstate New York learned the season lesson the hard way. The October flight was locked at 6500K under cloud and came back clean. The February reshoot ran on auto white balance over snow. Forty frames arrived at six temperatures with the snow reading gray. Matching color took longer than the flight had. The next winter flight used locked Kelvin and plus 0.7 EV, then cleared QA in one pass.
About the author
The Estate HDR Team edits aerial stills, drone video, HDR exteriors and virtual staging for photographers and brokerages across the United States. The studio has processed over 1M photos for 500+ agencies. This post reflects what the retouching desk sees each week. Estate HDR was founded in 2020 and its production, retouching and quality leads are named on the studio team page. The studio profile sits on the About Estate HDR page.
Where This Leaves Your Next Flight
Getting a drone for real estate photography to produce files worth editing comes down to five dials and the discipline to set them before the props spin. Lock ISO. Lock white balance. Respect the shutter rule. Bracket when contrast is high. Estate HDR turns those files into listing ready aerials and video, with a free first order, unlimited revisions and 24/7 support at info@estatehdr.com. The same logic applies to layout assets in why 2D and 3D floor plans sell properties faster. Questions about a tricky property can go straight to the contact page.
FAQ's About Drone for Real Estate Photography
What ISO should I use on an overcast day?
Stay at 100 if the shutter still lands at 1/400 or faster. Overcast light is softer than people expect and small sensors have very little headroom. If the frame comes out dark, open the aperture first and only then move ISO to 200. Treat 400 as an absolute ceiling for client work. Above that, roof shingles and brickwork start turning into mush that no editor can rebuild.
Do I need ND filters if I only shoot stills?
Usually not. Stills give you a free variable that video does not: shutter speed. In bright sun you simply shoot at 1/1000 or 1/2000 and the exposure sorts itself out. Filters matter for stills in two narrow cases. One is a long exposure over water at dusk. The other is a polarizer, which is a different tool entirely and cuts glare off windows and wet roofs.
Should I shoot a flat log profile for a listing video?
Only if the footage is definitely being graded. Flat profiles record more information at the bright and dark ends, which helps a colorist. They also arrive looking washed out. If the clip is going to a listing page with light editing, a standard profile gives a better result faster. Ask your editor first. Sending flat footage into a workflow that never grades it is worse than not shooting flat at all.
Why do my drone photos look soft even at a fast shutter speed?
Three usual suspects. The aperture is stopped down too far. f/8 or f/11 on a tiny lens bends light and softens the whole frame. Digital zoom is the second, since it stretches pixels that were never captured. The third is a drone still settling after a move. Give it two or three seconds to stabilize, then shoot. Also check the lens for a fingerprint or a smear of dust.
Can I fix a wrong white balance later if I shot JPG?
Partly. A JPG shifts a little without falling apart. The sensor data has already been thrown away and the file carries only 8 bits of tone per channel. Push it far and you get color banding in the sky plus muddy shadow tones. RAW lets an editor set temperature after the fact with no penalty. If you shoot JPG only, locking Kelvin in the air stops being a preference and becomes the job.
How many brackets should I send my editor from the air?
Three at minus 2, zero and plus 2 EV covers almost every exterior. Move to five on houses with metal roofs, big glass walls or heavy shade from mature trees. Do not bracket in gusty conditions. Frames that fail to line up create ghosting around leaves and railings that costs more editing time than the extra detail is worth. One clean RAW beats five misaligned ones every time.
What frame rate should I use for real estate video?
24 fps for a cinematic listing page clip and 30 fps for anything heading to social platforms that resample video. Pick one and keep every clip from that property on it. Mixed frame rates in a single set force the editor to conform footage before cutting, which adds time and can soften motion. Use 60 fps only for shots you intend to slow down. Remember the shutter and filter change with it.
Does high wind change my camera settings?
Yes, in two ways. Raise the stills shutter to 1/1000 or faster because the aircraft is making bigger corrections to hold position. Then drop bracketing and take single frames, since wind moves the drone between exposures and ruins the blend. For video, wind also argues for a slower gimbal pitch speed. Gusts plus a fast tilt produce footage that reads as nervous rather than smooth.
What gimbal pitch speed works best for a reveal shot?
Somewhere around 10 to 15 degrees per second on most controllers, which is usually the slowest setting available. A reveal works because the tilt feels unhurried. Faster settings turn a slow rise over a treeline into a head snap. Pair the slow pitch with reduced stick sensitivity and the slow flight mode. If your controller only offers presets, choose cinematic mode and fly the move longer than you think you need.